Banana PI + Android + Transmission Daemon
1. Download Android Image from :
2. Write Image to SD card and Boot Android on Banana PI
3. Install ADB Manager and after start it
https://play.google.com/store/apps/details?id=com.matoski.adbm&hl=en
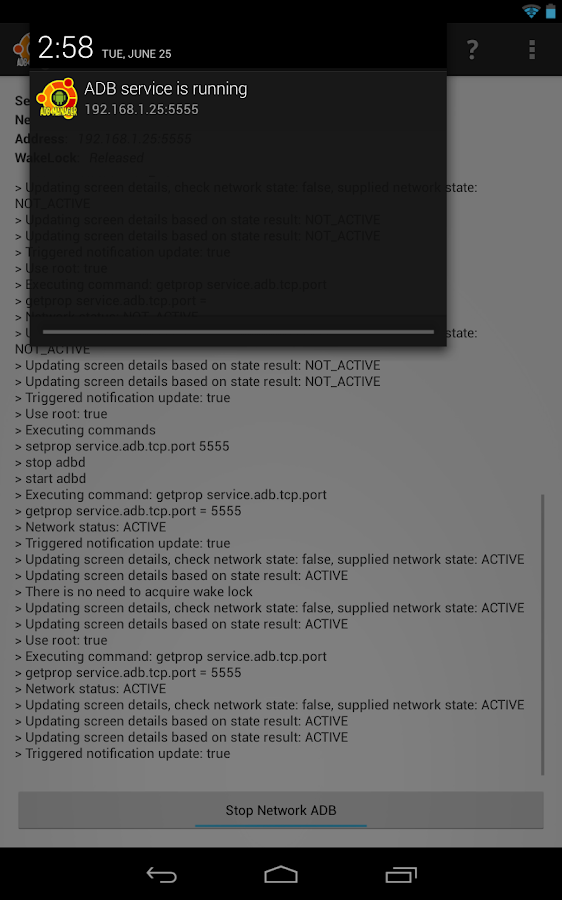
4. Check your Android Device IP address
5. On your Linux desktop, install Android SDK with ADB
http://developer.android.com/sdk/installing/index.html?pkg=tools
http://developer.android.com/sdk/installing/index.html?pkg=tools
6. Open a console and execute these commands:
adb tcpip 5555
adb connect Android_Device_IP:5555
adb devices -> You can see your connected device
7. wget https://www.dropbox.com/s/b84r485okw67y8f/optware-install-via-adb-MOD.sh
8.
run your ./optware-install-via-adb-MOD.sh
run adb shell this opens a shell to your device
check start.sh from /data/opt
9.
ipkg install transmission (install transmission daemon)
transmission-daemon (start)
killall transmission-daemon (kill)
vi /data/opt/home/root/.config/transmission-daemon/settings.json
modify rpc-whitelist: (add your Desktop PC IP)
transmission-daemon (start)
10. Check transmission on your Desktop PC (Add new connection to Transmission Remote GUI)

11.
vi /data/opt/start.sh before the /bin/sh line: Add transmission-daemon
12 .Install the app Script Manager (From Google Play)
In Script Manager click - Menu - Scripts - Browser and navigate to the file /data/opt/start.sh. Then check the SU, Boot and Net icons.
Screenshot from Script Manager

13. Reboot Banana PI and check again the Connection with Transmission Remote GUI
--------------------------------------------------------------------------------------------------------------------------
Script:optware-install-via-adb-MOD.sh
#!/bin/sh
#
# NSLU2-Linux Optware setup script for Android
# Copyright (c) 2012 Paul Sokolovsky <pfalcon@users.sourceforge.net>
# License: GPLv3, http://www.gnu.org/licenses/gpl.html
#
# http://sf.net/p/optware-android/
#
# Optware ARM binary packages repositories (aka feeds):
# http://ipkg.nslu2-linux.org/feeds/optware/cs08q1armel/
#
# Optware source code Subversion repository:
# svn co http://svn.nslu2-linux.org/svnroot/optware/trunk/
#
#set -x
# To install optware, we need root anyway. However, the fact that we can
# obtain root access on device doesn't mean we have root access with
# "adb push", i.e. can push to any location from host. So, we need
# a location writable by adb as a temporary transfer area. That's
# ADB_WRITABLE_DIR. /data/local is usually a good choice for most devices,
# but that can be anything, for example, /sdcard (there's no requirement
# for the filesystem with that dir supported Unix permissions, this script
# will get it right).
#
# OPTWARE_DIR is where to install optware, it should be on a partition with
# normal Unix filesystem (permissions, etc.)
OPTWARE_DIR=/data/opt
ADB_WRITABLE_DIR=/data/local
# Particular field to install from, stable by default
FEED=http://ipkg.nslu2-linux.org/feeds/optware/cs08q1armel/cross/stable
# DO NOT edit anything below this line unless you know what you are doing
start_script=start.sh
tmp_dir=$ADB_WRITABLE_DIR/optware.tmp
cs08q1_url=https://sourcery.mentor.com/sgpp/lite/arm/portal/package2549/public/arm-none-linux-gnueabi/arm-2008q1-126-arm-none-linux-gnueabi-i686-pc-linux-gnu.tar.bz2
cs08q1_fname=$(basename $cs08q1_url)
libc_path=arm-2008q1/arm-none-linux-gnueabi/libc
libc_libs="lib/ld-2.5.so ld-linux.so.3 \
lib/libc-2.5.so libc.so.6 \
lib/libm-2.5.so libm.so.6 \
lib/librt-2.5.so librt.so.1 \
lib/libpthread-2.5.so libpthread.so.0 \
lib/libresolv-2.5.so libresolv.so.2 \
lib/libdl-2.5.so libdl.so.2 \
lib/libnss_dns-2.5.so libnss_dns.so.2 \
lib/libutil-2.5.so libutil.so.1 \
lib/libgcc_s.so.1 libgcc_s.so \
lib/libnsl-2.5.so libnsl.so.1 \
lib/libcrypt-2.5.so libcrypt.so.1 \
lib/libBrokenLocale-2.5.so libBrokenLocale.so.1 \
lib/libanl-2.5.so libanl.so.1 \
lib/libcidn-2.5.so libcidn.so.1 \
lib/libnss_compat-2.5.so libnss_compat.so.2 \
lib/libnss_files-2.5.so libnss_files.so.2 \
lib/libnss_hesiod-2.5.so libnss_hesiod.so.2 \
lib/libnss_nis-2.5.so libnss_nis.so.2 \
lib/libnss_nisplus-2.5.so libnss_nisplus.so.2 \
lib/libthread_db-1.0.so libthread_db.so.1 \
"
#
# On-target (device) commands
#
t_cp () {
# copy file on a device
adb shell "cat $1 >$2"
}
t_cd_ln () {
local dir=$1
shift
adb shell "cd $dir; ln $1 $2 $3 $4 $5 $6"
}
t_chmod () {
adb shell "chmod $*"
}
t_mkdir_p () {
# This doesn't complain if dir exists, but can't create intermediate dirs
adb shell "mkdir $1"
}
t_rm_f () {
# Doesn't complain if file not there
adb shell "rm $1"
}
t_rm_rf () {
# Doesn't complain if dir not there
adb shell "rm -r $1"
}
t_remount_rw () {
adb shell "mount -o rw,remount $1 $1"
}
t_remount_ro () {
adb shell "mount -o ro,remount $1 $1"
}
extract_libc () {
if [ ! -d $(echo $libc_path | sed -e 's%/.*%%') ]; then
echo Extracting $cs08q1_fname
tar xfj $cs08q1_fname $list
fi
}
install_system_lib () {
local f=$(basename $1)
echo "Installing system lib: $f"
adb push $libc_path/$1 $tmp_dir
t_cp $tmp_dir/$f /lib/$f
t_chmod 0755 /lib/$f
t_cd_ln /lib/ -s $f $2
}
install_system_bin () {
local f=$(basename $1)
echo "Installing system bin: $1"
adb push $libc_path/$1 $tmp_dir
t_cp $tmp_dir/$f /bin/$f
t_chmod 0755 /bin/$f
}
install_libc () {
while [ -n "$1" ]; do
local lib=$1
shift
local symlink=$1
shift
install_system_lib $lib $symlink
done
}
install_bin () {
echo "Installing /opt/bin/$1"
t_cp $tmp_dir/bin/$1 /opt/bin/$1
t_chmod 755 /opt/bin/$1
}
install_ipkg () {
adb push opt $tmp_dir
t_mkdir_p /opt/bin
t_mkdir_p /opt/lib
install_bin ipkg
t_cp $tmp_dir/lib/libipkg.so.0.0.0 /opt/lib/libipkg.so.0.0.0
t_cd_ln /opt/lib/ -s libipkg.so.0.0.0 libipkg.so.0
t_cd_ln /opt/lib/ -s libipkg.so.0.0.0 libipkg.so
}
fetch_package_index () {
if [ ! -f Packages ]; then
echo "Downloading Optware package index"
wget -q $FEED/Packages
else
echo "Using cached Optware package index"
fi
}
get_package_fname () {
awk "/^Filename: ${1}_/ {print \$2}" Packages
}
fetch_package () {
if [ -z "$1" ]; then
echo "Unexpected error: package '$1' not found in index"
exit 1
fi
if [ ! -f "$1" ]; then
echo "Downloading Optware package $1"
wget -q $FEED/$1
else
echo "Using cached package $1"
fi
}
fetch_toolchain () {
if [ ! -f $cs08q1_fname ]; then
echo "You need CodeSourcery ARM-Linux toolchain release 2008q1: $cs08q1_fname"
echo "if you have this file on your system already, press Ctrl-C now and copy"
echo "it into the current directory. Otherwise, press Enter to download it (65MB)."
read
wget $cs08q1_url
fi
}
optware_uninstall () {
t_remount_rw /
adb shell "rm -r $OPTWARE_DIR"
adb shell "rm /lib"
adb shell "rm /bin"
adb shell "rm /opt"
adb shell "rm /tmp"
t_remount_ro /
t_remount_rw /system
adb shell "rm /etc/resolv.conf"
adb shell "rm /etc/mtab"
adb shell "rm /etc/passwd"
adb shell "rm /etc/group"
t_rm_rf $tmp_dir
t_remount_ro /system
echo "Optware sucessfully uninstalled"
}
#
# Main code
#
if [ "$1" == "" ]; then
echo "This script installs NSLU Optware on an Android device connected using ADB"
echo "Usage: $0 install|uninstall"
exit 1
fi
if [ "$1" == "uninstall" ]; then
optware_uninstall
exit
fi
fetch_toolchain
fetch_package_index
ipkg_fname=$(get_package_fname ipkg-opt)
wget_fname=$(get_package_fname wget)
busybox_fname=$(get_package_fname busybox-base)
fetch_package $ipkg_fname
fetch_package $wget_fname
fetch_package $busybox_fname
t_remount_rw /
# Start from scratch
echo "== Initializing optware environment =="
echo $tmp_dir
t_rm_rf $tmp_dir
t_mkdir_p $tmp_dir
t_mkdir_p $OPTWARE_DIR
t_cd_ln . -s $OPTWARE_DIR /opt
t_mkdir_p $OPTWARE_DIR/rootbin
t_cd_ln . -s $OPTWARE_DIR/rootbin /bin
t_mkdir_p $OPTWARE_DIR/rootlib
t_cd_ln . -s $OPTWARE_DIR/rootlib /lib
t_mkdir_p $OPTWARE_DIR/tmp
t_cd_ln . -s $OPTWARE_DIR/tmp /tmp
t_mkdir_p $OPTWARE_DIR/home
t_mkdir_p $OPTWARE_DIR/home/root
t_mkdir_p $OPTWARE_DIR/home/user
echo "== Installing libc =="
extract_libc
install_libc $libc_libs
install_system_bin usr/bin/ldd
echo "== Installing bootstrap ipkg =="
rm -rf opt
tar -xOzf $ipkg_fname ./data.tar.gz | tar -xzf -
install_ipkg
echo "== Installing bootstrap wget =="
rm -rf opt
tar -xOzf $wget_fname ./data.tar.gz | tar -xzf -
adb push opt $tmp_dir
install_bin wget
echo "== Installing bootstrap busybox =="
rm -rf opt
tar -xOzf $busybox_fname ./data.tar.gz | tar -xzf -
adb push opt $tmp_dir
install_bin busybox
echo "== Initializing bootstrap /bin =="
# We need sane shell as /bin/sh
t_cd_ln /bin -s /opt/bin/busybox sh
# We need minimal set of sane shell commands to run update-alternatives
# script to properly (re)install busybox itself
t_cd_ln /bin -s /opt/bin/busybox echo
t_cd_ln /bin -s /opt/bin/busybox rm
t_cd_ln /bin -s /opt/bin/busybox rmdir
t_cd_ln /bin -s /opt/bin/busybox sed
t_cd_ln /bin -s /opt/bin/busybox mkdir
t_cd_ln /bin -s /opt/bin/busybox head
t_cd_ln /bin -s /opt/bin/busybox sort
t_cd_ln /bin -s /opt/bin/busybox dirname
t_cd_ln /bin -s /opt/bin/busybox ln
t_cd_ln /bin -s /opt/bin/busybox mv
t_cd_ln /bin -s /opt/bin/busybox cat
t_cd_ln /bin -s /opt/bin/busybox chown
t_cd_ln /bin -s /opt/bin/busybox chmod
# gzip and tar should be part of Android, but there were reports
# that some implementations may be broken
t_cd_ln /bin -s /opt/bin/busybox tar
t_cd_ln /bin -s /opt/bin/busybox gzip
echo "== Configuring package feed =="
t_mkdir_p /opt/etc
t_mkdir_p /opt/etc/ipkg
adb shell "echo src cross $FEED > /opt/etc/ipkg/feeds.conf"
echo "== Configuring domain name resolution =="
adb shell "echo nameserver 8.8.8.8 >/opt/etc/resolv.conf"
# On a normal Android system, /etc is symlink to /system/etc, but just in case...
t_mkdir_p /etc
# but for normal system, we need to remount /system
t_remount_rw /system
t_rm_f /etc/resolv.conf
t_cd_ln . -s /opt/etc/resolv.conf /etc/resolv.conf
echo "== Configuring GLIBC Namespace Switch =="
adb push nsswitch.conf $tmp_dir/nsswitch.conf
t_cp $tmp_dir/nsswitch.conf /etc/nsswitch.conf
t_chmod 0644 /etc/nsswitch.conf
t_rm_f $tmp_dir/nsswitch.conf
echo "== Configuring /etc/mtab =="
t_cd_ln . -s /proc/mounts /etc/mtab
echo "== Configuring users =="
adb shell "echo root:x:0:0:root:/opt/home/root:/bin/sh >/opt/etc/passwd"
adb shell "echo shell:x:2000:2000:shell:/opt/home/user:/bin/sh >>/opt/etc/passwd"
t_cd_ln . -s /opt/etc/passwd /etc/passwd
echo "== Configuring groups =="
adb shell "echo root:x:0:root >/opt/etc/group"
adb shell "echo shell:x:2000:shell >>/opt/etc/group"
t_cd_ln . -s /opt/etc/group /etc/group
t_remount_ro /system
echo "== Creating optware init script =="
adb shell "echo \#\!/system/bin/sh >/opt/optware-init.sh"
adb shell "echo 'ls /opt >/dev/null 2>&1 && exit' >>/opt/optware-init.sh"
adb shell "echo echo Reinitializing optware rootfs links >>/opt/optware-init.sh"
adb shell "echo mount -o rw,remount rootfs / >>/opt/optware-init.sh"
adb shell "echo ln -s $OPTWARE_DIR /opt >>/opt/optware-init.sh"
adb shell "echo ln -s $OPTWARE_DIR/rootlib /lib >>/opt/optware-init.sh"
adb shell "echo ln -s $OPTWARE_DIR/rootbin /bin >>/opt/optware-init.sh"
adb shell "echo ln -s $OPTWARE_DIR/tmp /tmp >>/opt/optware-init.sh"
adb shell "echo mount -o ro,remount rootfs / >>/opt/optware-init.sh"
t_chmod 0755 /opt/optware-init.sh
echo "== Creating optware startup script =="
adb shell "echo \#\!/system/bin/sh >/opt/$start_script"
adb shell "echo 'ls /opt >/dev/null 2>&1 ||' su -c $OPTWARE_DIR/optware-init.sh >>/opt/$start_script"
adb shell "echo \# You may want to add /opt/local/bin to PATH below >>/opt/$start_script"
adb shell "echo export PATH=/opt/sbin:/opt/bin:/bin:/system/bin >>/opt/$start_script"
adb shell "echo 'HOME=/opt/home/root' >>/opt/$start_script"
adb shell "echo export HOME>>/opt/$start_script"
adb shell "echo export TMPDIR=/tmp >>/opt/$start_script"
adb shell "echo umask 022 >>/opt/$start_script"
adb shell "echo /bin/sh >>/opt/$start_script"
t_chmod 0755 /opt/$start_script
# Create "s" symlink to ease typing on touchscreen devices
t_cd_ln /opt -s $start_script s
t_remount_ro /
echo "== Reinstalling bootstrap packages =="
echo "Make sure that your device is woken up and connected to the Internet"
echo "Press Enter to continue"
read
#
# Now that we have all dependencies to run ipkg bootstraped on device,
# we need to use ipkg to reinstall itself and all those dependencies,
# to make sure they're installed and configured properly.
#
adb shell "PATH=/opt/bin:/bin /opt/bin/ipkg update"
adb shell "PATH=/opt/bin:/bin /opt/bin/ipkg install ipkg-opt"
adb shell "PATH=/opt/bin:/bin /opt/bin/ipkg install wget"
adb shell "PATH=/opt/bin:/bin /opt/bin/ipkg install busybox"
echo "== Cleaning device tmp directory =="
t_rm_rf $tmp_dir
echo "== Cleaning local directory =="
rm -rf opt arm-2008q1
echo "Optware for Android installation complete."
echo "To start optware session, execute $OPTWARE_DIR/$start_script (aka $OPTWARE_DIR/s) on the device"


